 I got the directions for making the shirt from the Scor-Pal website, from designer Cambria Tumbow. The shirt looks like it would be complicated but it really is not, with the use of the Scor-Pal! The shirt would also be cute on a scrapbook page featuring Dad or Grandpa too, not just for a card. If you're not familiar with the Scor-Pal, it is such a handy tool. I use it nearly everyday for my cards and scrapbook pages. It fits papers up to 12x12 and helps you quickly score and design projects, such as this shirt card.
 For the shirt, you want a piece of decorator paper that measures 4 x 6. I used paper from the TAC paper collection "Just Like Dad." The paper is not patterned on both sides but that is ok for this shirt because of the way you fold the paper you don't see the white side. Just Like Dad is a nice 6 x 6 paper collection to have on hand for your more masculine themed projects.
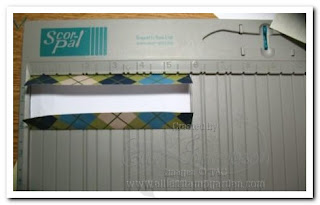
Step 1: Score your 4 x 6 paper 1 inch on each side.

Step 2: Fold on your score marks.

Step 3: Score 1/2 inch on ONE side.
Step 4: Fold back on your score line, use your bone folder tool to crease well. 
Step 5: To make the collar, fold the top down to meet the fold in the middle. Use your bone folder to help make the crease neat and flat.
 Flip out the bottom to make the "arm" flaps of the shirt, starting from your center fold out.

Step 5: To make the collar, fold the top down to meet the fold in the middle. Use your bone folder to help make the crease neat and flat.

 Flip out the bottom to make the "arm" flaps of the shirt, starting from your center fold out.
Step 6: Fold the bottom back up under the collar and now you have the shirt. I added a strip of blue cardstock for the tie. I layered the shirt on matching navy blue cardstock on the base of matching green cardstock. I cute a strip of decorated paper from the same paper collection as the shirt and stamped "Dad" in black ink on that strip of paper. It's really an easy card to make once you have tried making the shirt card one time. Try practicing the shirt card on some scratch paper to practice the fold.
 tháng 6 19, 2009


Không có nhận xét nào
Đăng nhận xét